Klaviyo Unsubscribe Hosted Page Setup Guide
This guide explains how to set up a Klaviyo unsubscribe hosted page to automatically redirect unsubscribes to your Last Chance page.
Overview
Klaviyo hosted pages allow you to create custom HTML pages that are hosted by Klaviyo. By setting up a dedicated unsubscribe hosted page, you can automatically redirect all unsubscribe requests to your Last Chance page without needing to update individual unsubscribe links in your email templates.
Related article: Klaviyo unsubscribe link guide (how the Klaviyo unsubscribe link fits with hosted pages and Last Chance).
Benefits
- No template updates needed - Works with all your existing emails automatically
- Automatic redirect - All unsubscribe clicks go through your Last Chance page
- Easy to revert - Can switch back to Klaviyo's default anytime
- Branded subdomain — Copy Code uses your branded hostname when a subdomain or custom domain is active (guide). If you pasted HTML before enabling branding, update each hosted page in Klaviyo with fresh HTML from Last Chance.
Branded host + hosted page HTML
When Last Chance generates hosted page HTML for a branded public URL (platform subdomain or custom domain), the script tag:
- Uses your branded origin in
src(for examplehttps://unsubscribe.yourbrand.com/api/scripts/hosted-redirect) - Includes
data-branded-host="true" - Does not include
data-team-id— the app resolves your team from the hostname
If you hand-edit HTML, match that pattern on your branded host. On the shared www app URL, keep data-team-id as today.
Prerequisites
Before you begin:
- ✅ Your Last Chance unsubscribe page is created and published
- ✅ Your Klaviyo integration is connected in Last Chance
- ✅ You have admin access to your Klaviyo account
- ✅ Your Klaviyo emails use the standard unsubscribe tag or editor option so clicks go through Klaviyo’s unsubscribe flow (see Klaviyo unsubscribe and preference links in emails)
Setup Process
Step 1: Enable Hosted Pages in Klaviyo
- Navigate to Klaviyo Consent Pages Settings
- Enable the hosted pages feature in your Klaviyo account
Step 2: Create Your Unsubscribe Hosted Page
- Navigate to Klaviyo Hosted Pages
- Click Create New Hosted Page
- Give it a name (e.g., "last_chance_unsub")
Step 3: Copy and Paste the HTML Code
Copy the personalized HTML code below and paste it into your new unsubscribe hosted page. This code includes your unique team ID and automatic redirect logic.
💡 Note: If you're viewing this guide from your dashboard (via Settings → Email Providers → Klaviyo → Unsubscribe Hosted Page Setup), you'll see your personalized HTML code below. If you're not signed in, you'll need to sign in to see your personalized code.
🔒 Authentication Required: To see your personalized HTML code with your team ID, please sign in to your account. Once signed in, refresh this page to see your personalized code automatically populated below.
Step 4: Configure Email Unsubscribe
- Go back to Klaviyo Consent Pages Settings
- Click the vertical ellipsis (three dots) on the "Email Unsubscribe" section
- Select Use hosted page
- Choose the hosted page you just created
- Click Save
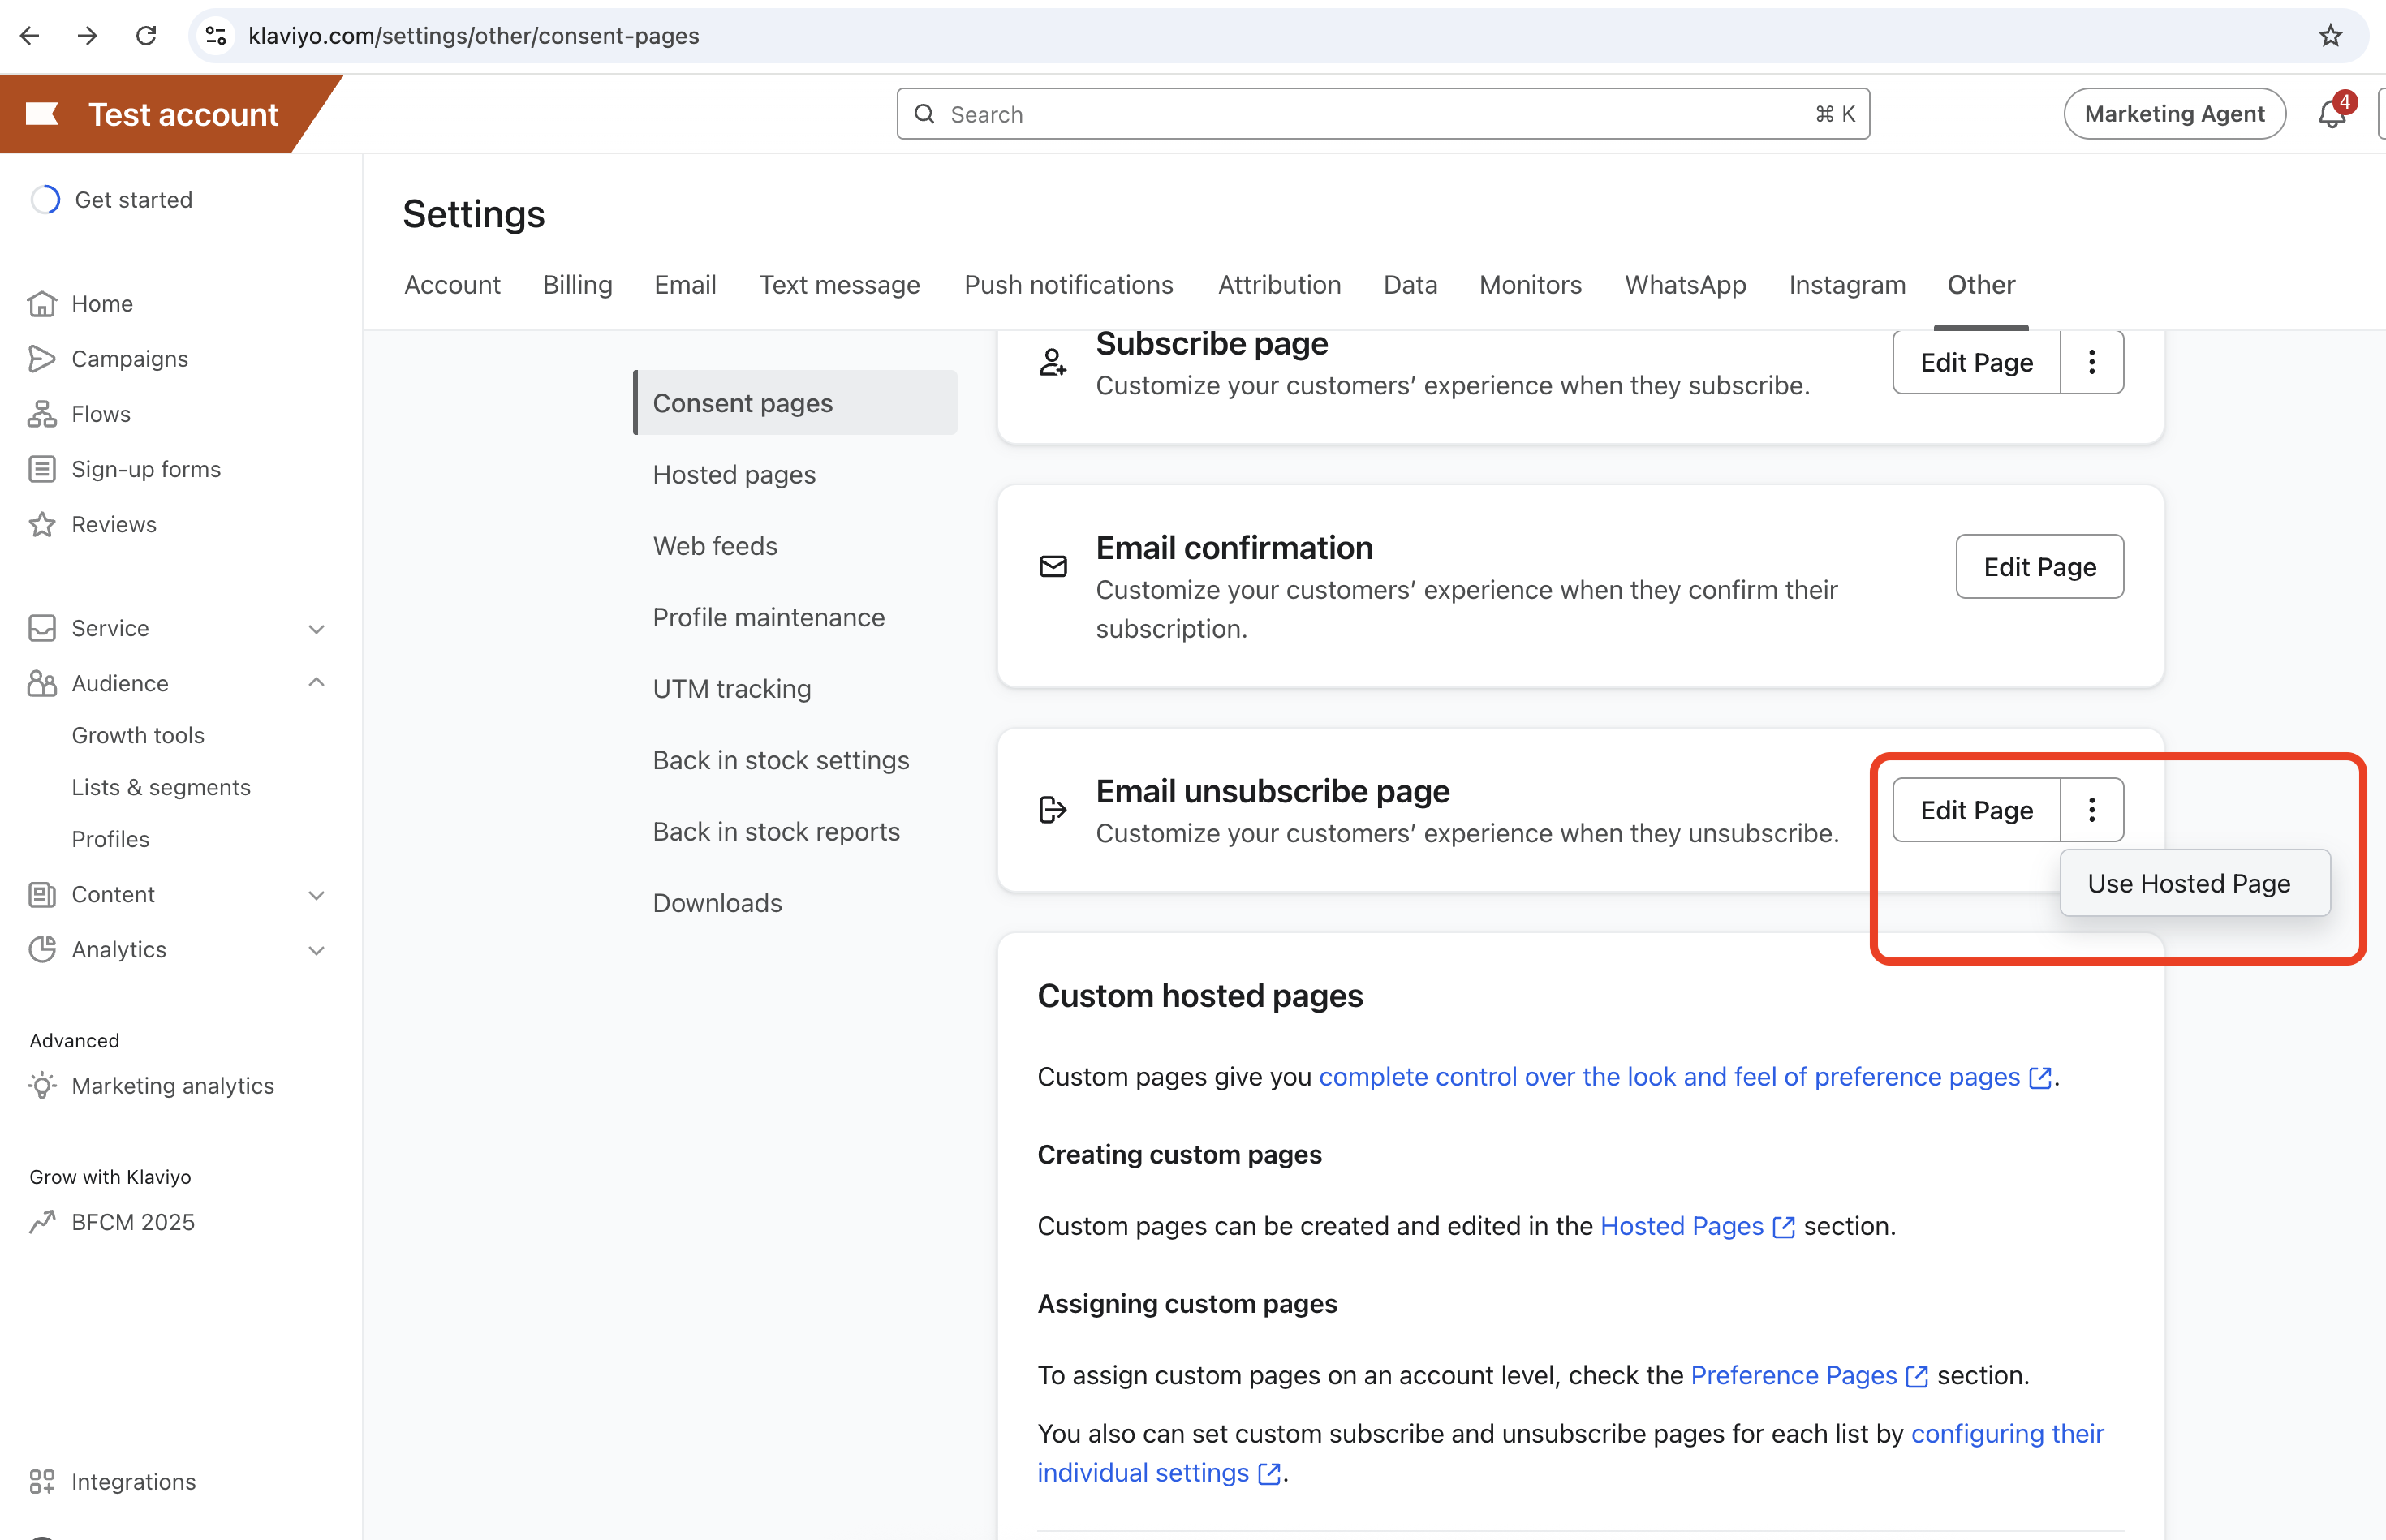 Click the vertical ellipsis (three dots) to access the "Use hosted page" option
 Select your unsubscribe hosted page from the dropdown and click "Save"
How It Works
Here is what happens when a subscriber clicks "Unsubscribe" in your Klaviyo email:
1. Subscriber clicks "Unsubscribe" in email
   ↓
2. Navigated to your Klaviyo unsubscribe hosted page
   ↓
3. Unsubscribe hosted page Last Chance JavaScript executes automatically
   ↓
4. Redirects to your published Last Chance page
   ↓
5. Last Chance page displays your custom unsubscribe experience
Verifying Setup
After completing the setup:
- Check the setup status - The setup checklist in your unsubscribe page editor will show the Klaviyo unsubscribe hosted page setup as complete
- Test the flow - Send yourself a test email from Klaviyo and click the unsubscribe link. You can also click any unsubscribe link from any historical email already sent from Klaviyo.
- Verify redirect - You should be redirected to your published Last Chance page
Reverting to Default
If you need to revert back to Klaviyo's default unsubscribe page, follow these steps:
⚠️ Important: Reverting will remove your custom Last Chance unsubscribe page and return to Klaviyo's default unsubscribe experience. Subscribers will no longer be redirected to your Last Chance page.
Step 1: Navigate to Consent Pages Settings
- Go to your Klaviyo Consent Pages Settings
- You'll see the "Email Unsubscribe" section with your current unsubscribe hosted page configuration
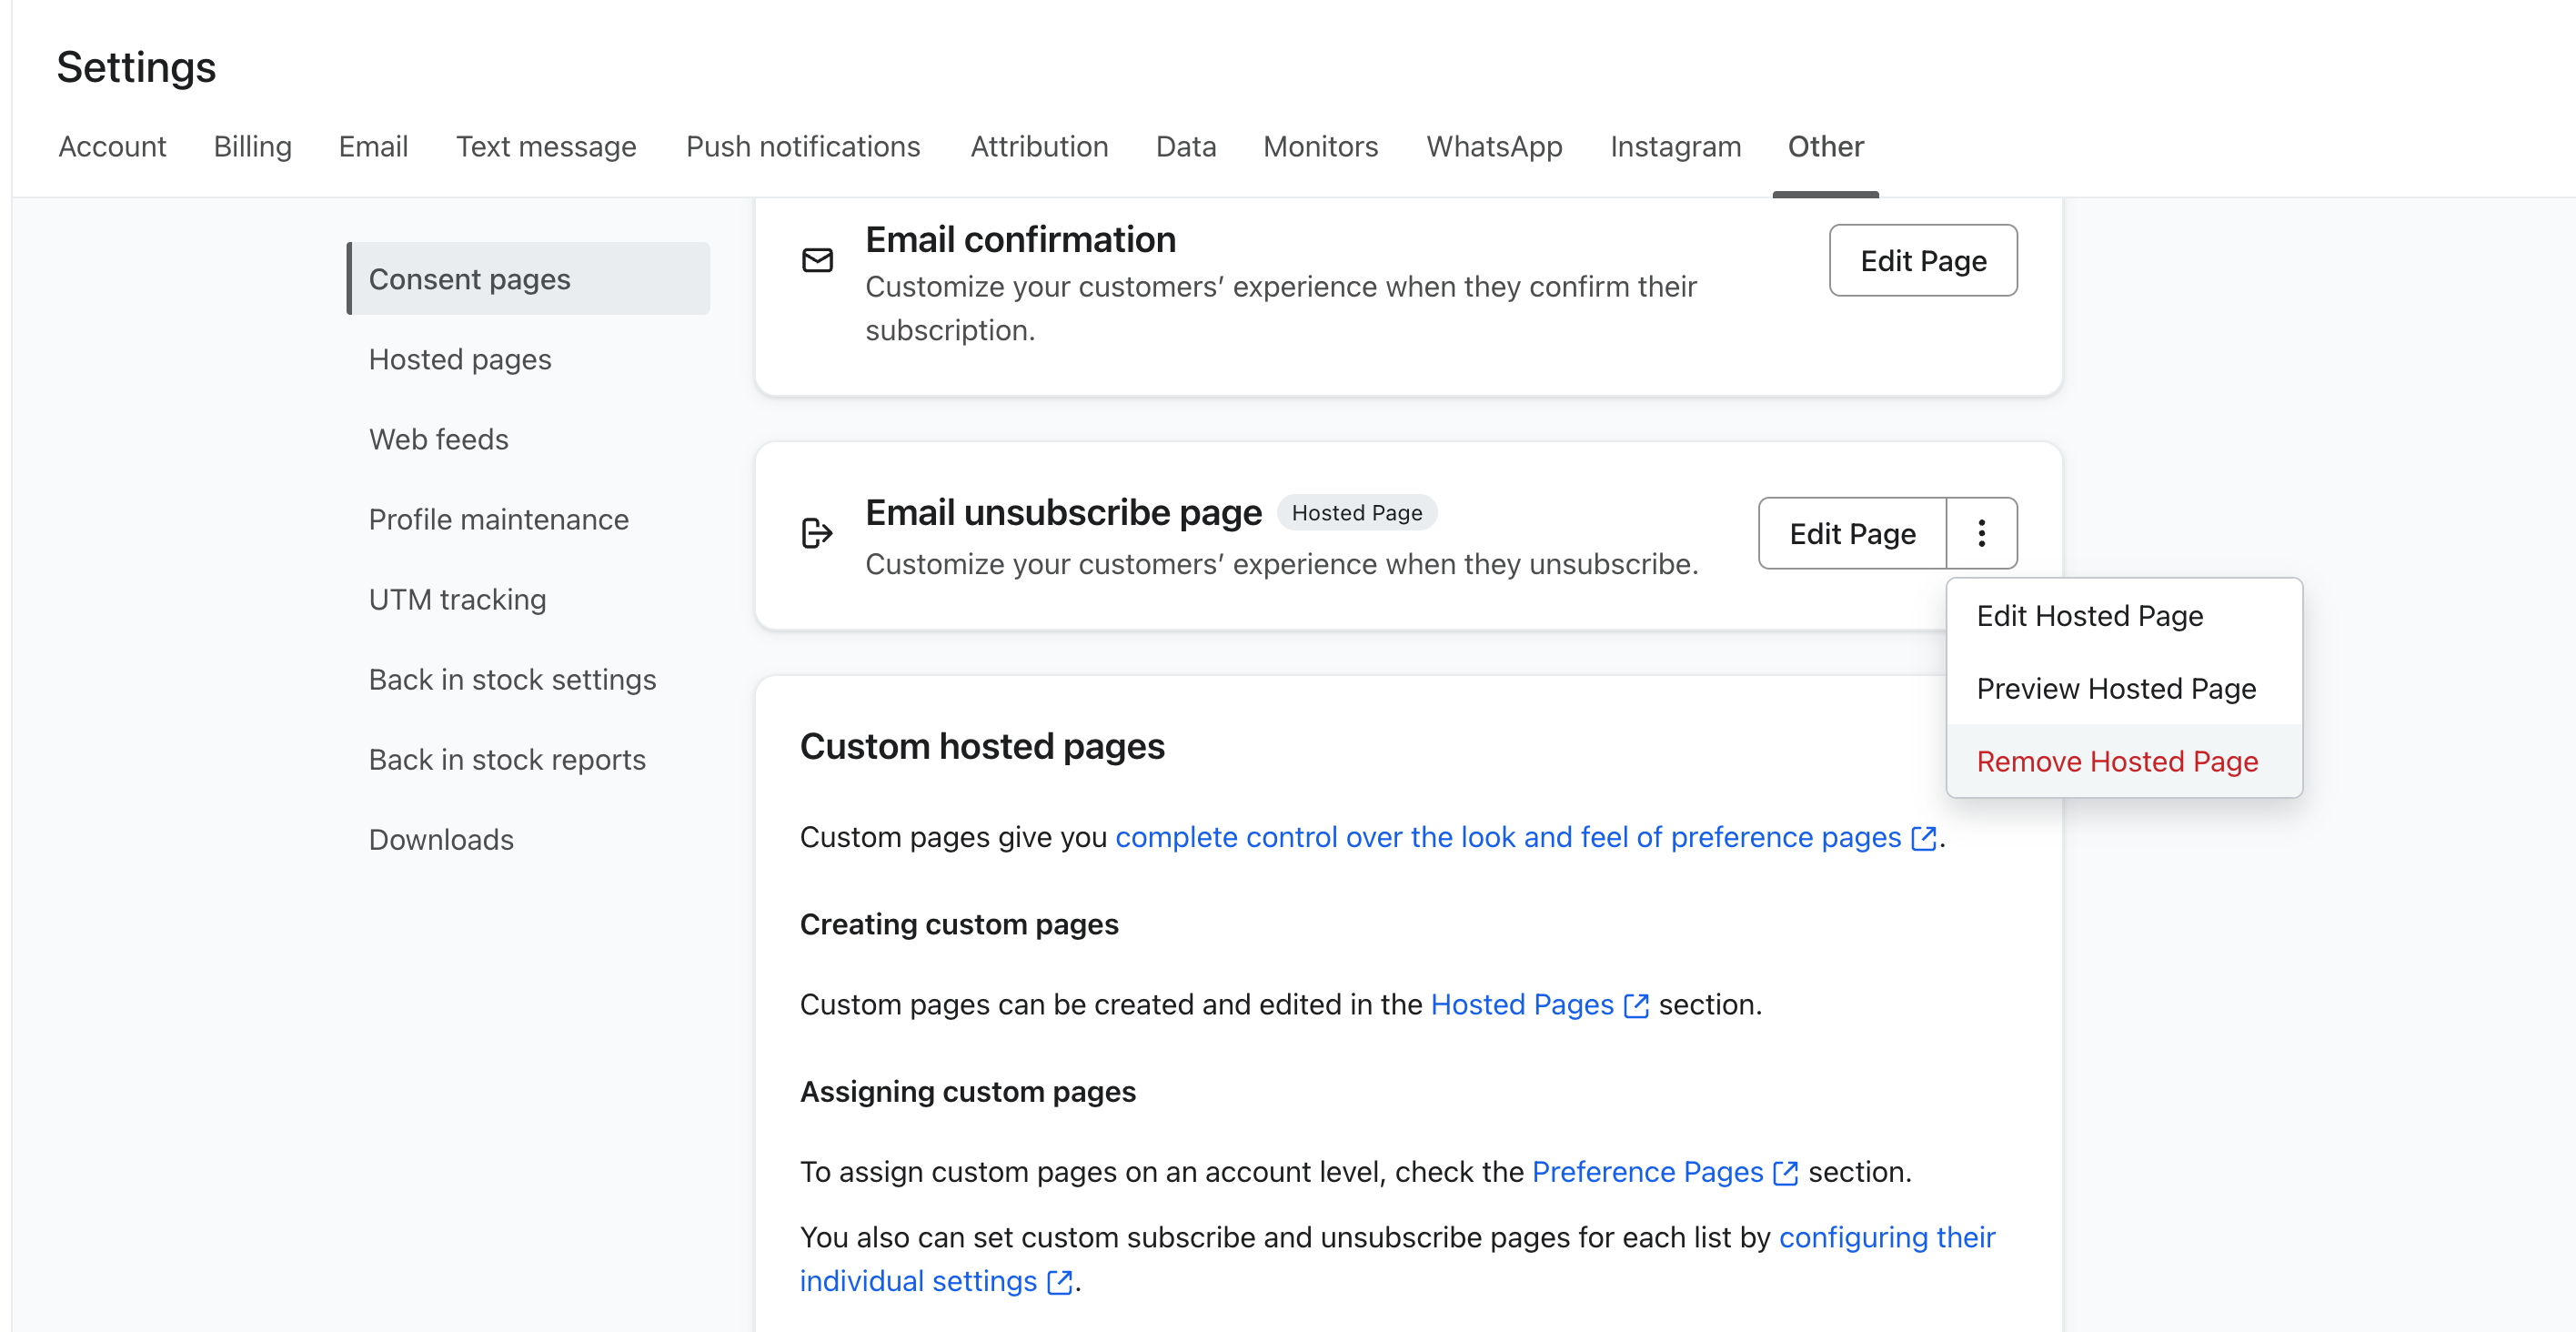 Klaviyo consent pages showing how to revert to default unsubscribe page
Step 2: Revert to Default Unsubscribe Page
- Click the vertical ellipsis (three dots) button on the "Email Unsubscribe" section
- Select the option to revert back to Klaviyo's default unsubscribe page
- Confirm the revert when prompted
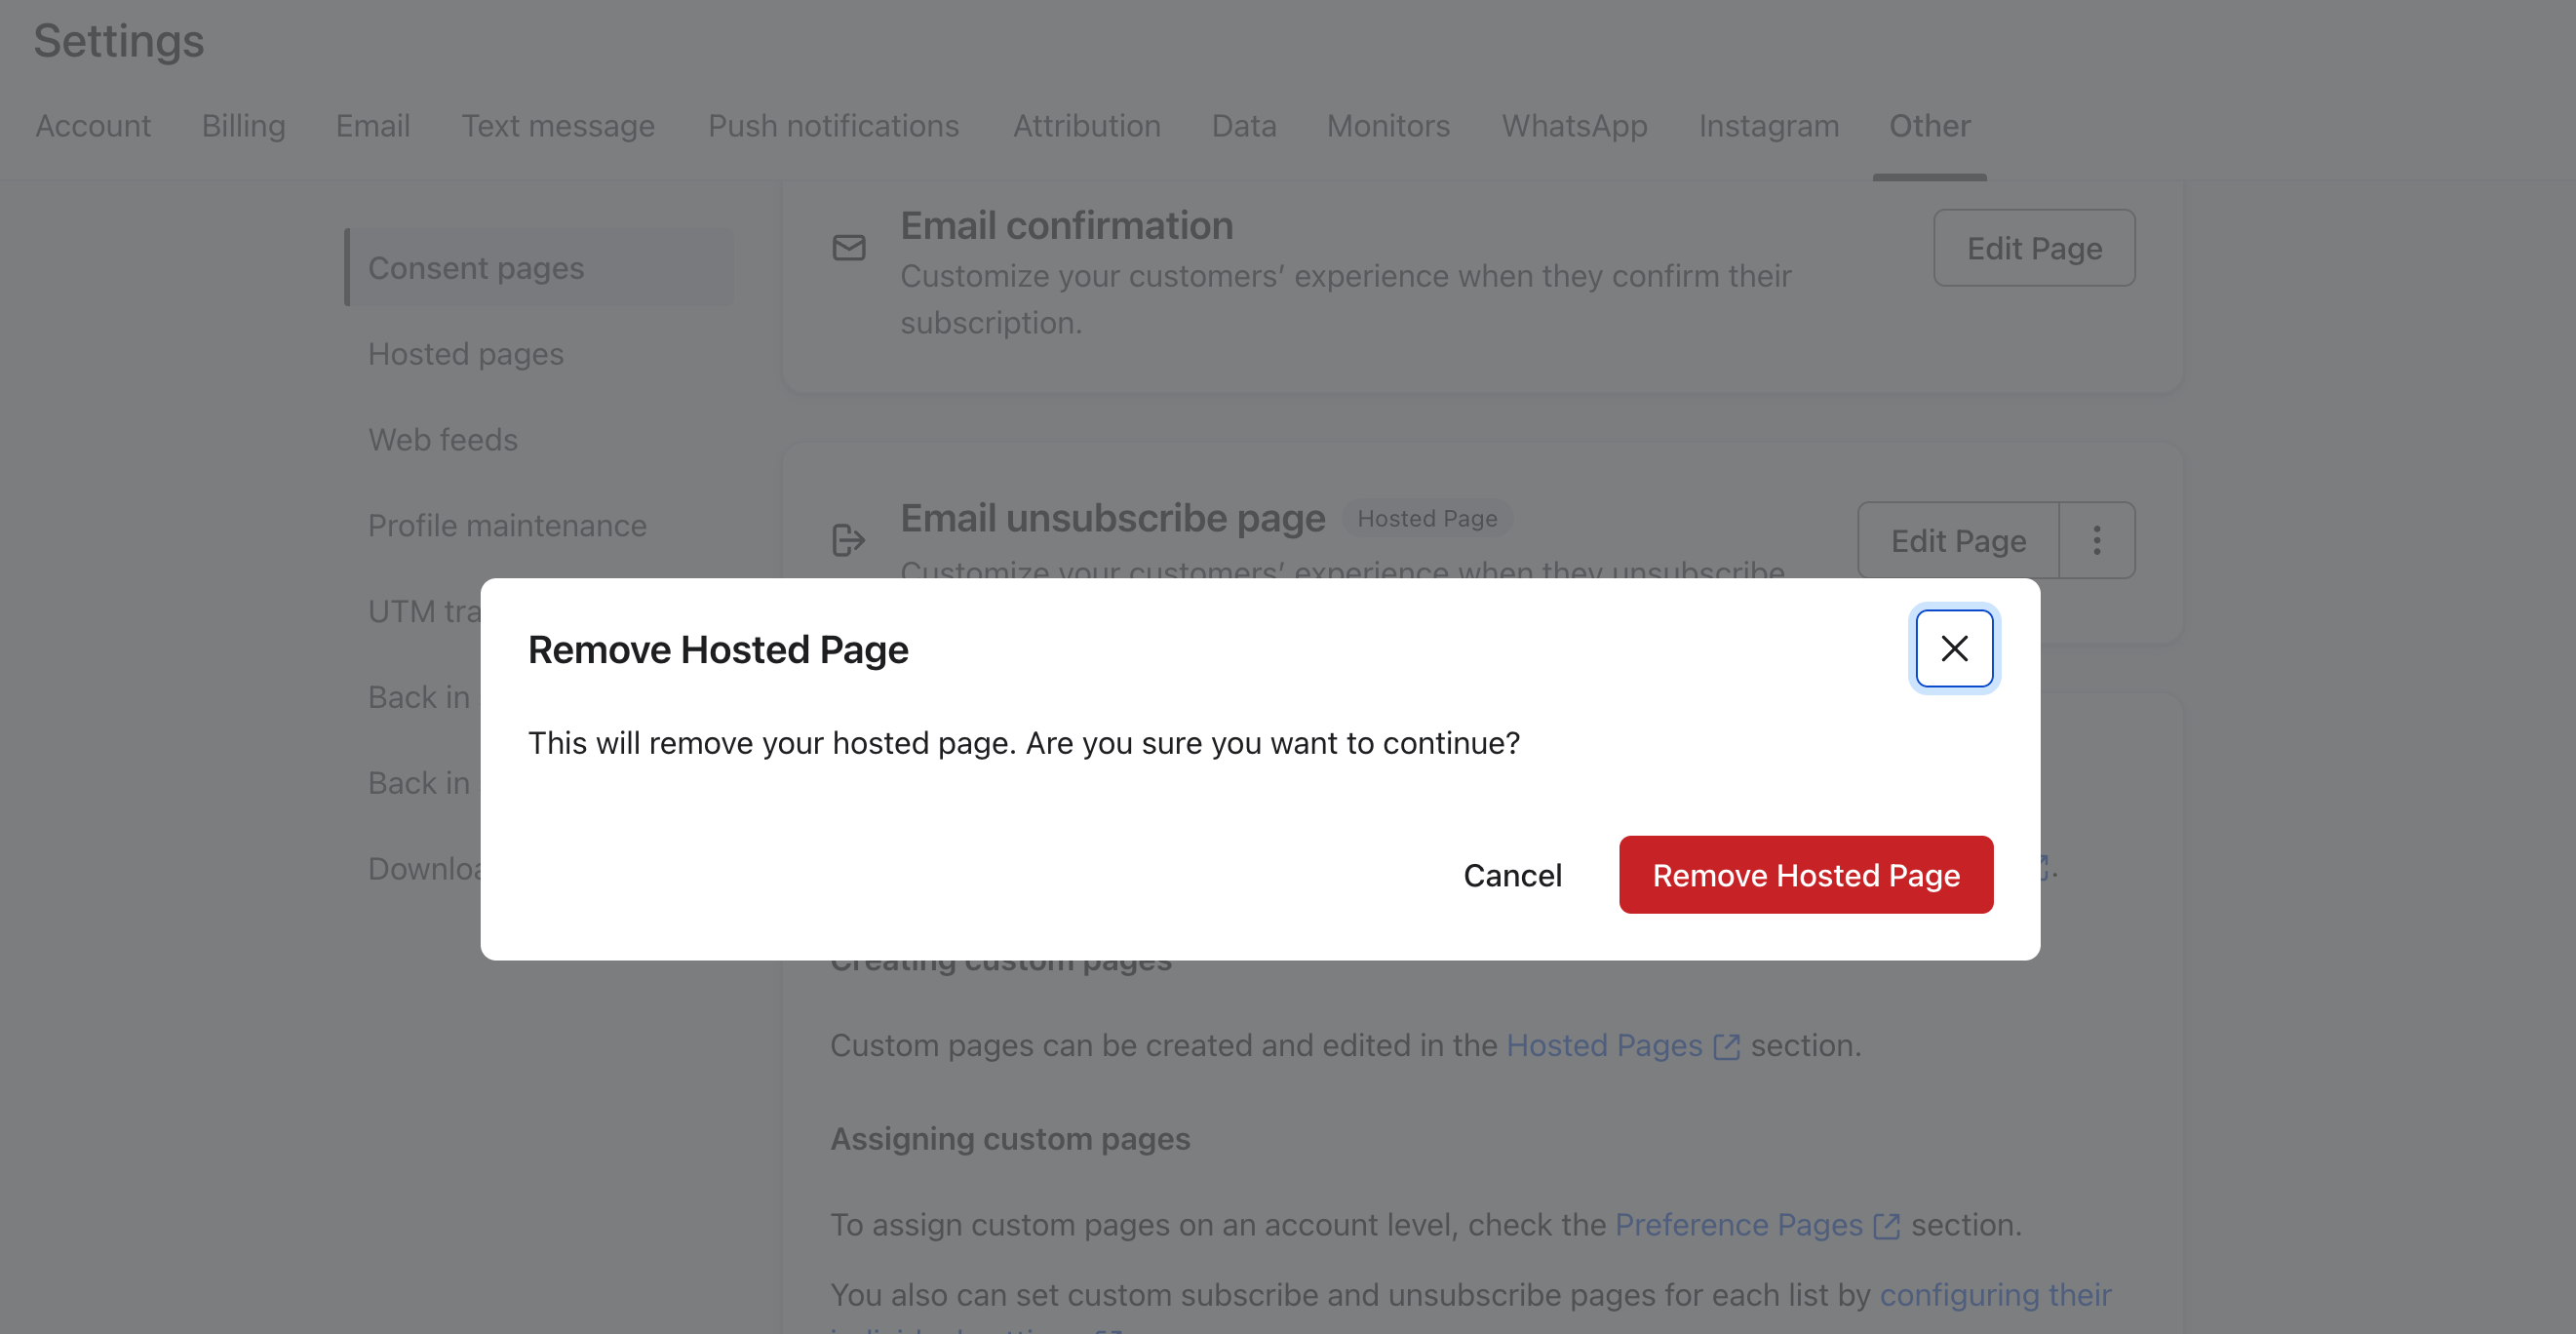 Confirmation screen for reverting to default unsubscribe page
After reverting, all unsubscribe clicks will go directly to Klaviyo's default unsubscribe page instead of your Last Chance page. You can always set up the unsubscribe hosted page again using the setup guide above.
Troubleshooting
Unsubscribe Hosted Page Not Redirecting
- Verify the HTML code was copied correctly (check for any line breaks or formatting issues)
- Ensure the unsubscribe hosted page is set as the default unsubscribe page in Klaviyo settings
- Check browser console for any JavaScript errors
Page Not Showing
- Ensure your Last Chance unsubscribe page is published
- Verify your Klaviyo integration is connected and active
- Check that the team ID in the HTML matches your account
Additional Resources
- Getting Started Guide - Complete setup walkthrough
- Klaviyo unsubscribe and preference links in emails - Tags, templates, and consent-page routing
- How to add an unsubscribe link to Klaviyo emails - Klaviyo Help Center
- Getting started with consent pages - Klaviyo Help Center
- Klaviyo Hosted Pages Documentation - Official Klaviyo docs
Next Steps
After setting up the unsubscribe hosted page:
- Monitor analytics - Track unsubscribe page performance
- Test with real emails - Verify the flow works with actual campaigns
- Optimize your page - Improve retention rates based on analytics
For questions or support, contact us at support@yourlastchance.app.